Wednesday, October 20, 2010

Dimension Table Vs Fact Table


Dimension Table features
·         It provides the context /descriptive information for a fact table measurements.
·          Provides entry points to data.
·          Structure of Dimension - Surrogate key one or more other fields that compose the natural key (nk) and set of  attributes.
·          Size of Dimension Table is smaller than Fact Table.
·          In a schema more number of dimensions are presented than Fact Table.
·          Surrogate Key is used to prevent the primary key (pk) violation(store historical data).
·          Values of fields are in numeric and text representation.
Fact Table features
·         It provides measurement of an enterprise.
·         Measurement is the amount determined by observation.
·         Structure of Fact Table - foreign key (fk) Degenerated Dimension and Measurements.
·         Size of Fact Table is larger than Dimension Table.
·         In a schema less number of Fact Tables observed compared to Dimension Tables.
·         Compose of Degenerate Dimension fields act as Primary Key.
·         Values of the fields always in numeric or integer form.
The main difference between dimension and the fact table is that Dimension preserves the historical data (like in case of type2) we will have to use update strategy and other transformations to make that happen but fact will be a direct load with few one or more lookups from the dimension and also since the fact and dimenision has the foriegn key relationship the dimension has to be loaded first before the fact.

I think there won't be any logic difference in a mapping to load dimension table & fact table. We can load the dimension table directly but we can't load the fact table first. So to load the fact table we need to load the dimension table first. Also while loading the fact table we will make a lookup on the dimensioin table cause the fact table contains the measures/facts & the foreign keys which are primary keys in the dimension tables surrounded to that fact table. We can load the dimension table & fact table in one mapping by using the Target Load Order/Target Load Plan in informatica.

Target 1 (Dimension Table)
Target 2 (Fact Table)

Dimention Table - A pure dimention table is a collection of primary keys
Fact Table - A pure fact table is collection of foreign keys.
Fact table contains numeric facts. i.e. key performence indicatiors. A dimention table is a primary key foregin key relation to fact tbale.

To load the fact table we need to load the dimension table first. Also while loading the fact table we will make a lookup on the dimensioin table, cause the fact table contains the measures/facts & the foreign keys which are primary keys in the dimension tables surrounded to that fact table. We can load the dimension table & fact table in one mapping by using the "Target Load Order/Target Load Plan" in informatica.


What is SCD.?

SCD: Slowly changed dimension
The SCD how to Capture the change data with respect to the time.
For ex: In an organization emp sal is chaged 
        according to his perfomence after chaned sal we kept in 
        datawarehouse. 
(Datawarehouse maintain a Historical data )
there are 3 types of SCDs.
Type1: It will maintain curren data only. It does't 
maintain historical data.
Type2: It maintain current and historical data.
Type3: It maintain current and previous data it mease 
Parcial data only maintain.
So generelly datawarehouser is maintain Historical data 
hence Type 2 is useful

Thursday, July 22, 2010

simple mapping & workflow

This post will cover a)How to create Repository User accounts and managing security in Informatica
b)Create a mapping , session, workflow and successfully execute a workflow

How to create Repository User accounts and managing security in Informatica

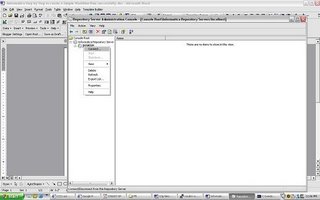
1) Login to Repository Server Admin console.Connect to the Repository Server


Right click and create new Repository 4)give the following :
repository name
db connect string
db username : pcenter1
db password : pcenter1

license key information
when you click Apply the Repository content will get created.

5)Once the Repository is created loginto Repsoitory Manager
You can loginto the Repository either as
a) The Repository username/ password provided in the above step
b) Or Administrator
Go the Security > Manage Users and Privileges


By default 2 grps are created “Administrator” and “Public”
2 users are created “Administrator” and “Repository User”
Privileges tab lists all the privileges that are available. This security window can be used to manage Security and privileges – refer help guide for further information on security and privileges.

Create a mapping , session, workflow and successfully execute a workflow

I will use the HR schema to demonstrate how you can create a mapping, session and workflow. The HR schema has the following tables

COUNTRIES
DEPARTMENTS
EMPLOYEES
JOBS
JOB_HISTORY
LOCATIONS
REGIONS
COUNTRY_REGION is table that has country_name and region_name.

To populate the country_region table : is a join between the country table and the region table
To create a mapping:
Open Repository Manager – Connect to the Repository and create new folder within the Repository using Repository Manager.
Connect to Designer

Open the folder up and you should see Sources, Targets , Cubes , Dimensions etc.
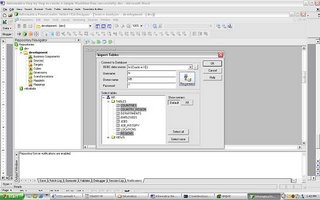
From the Sources menu import from source Database objects you need: in this case you will import COUNTRIES and REGION
Open Warehouse Designer and Import TargetsImport COUNTRY_REGION from Target Menu. Sources and Targets Menu should be as above

Open Mapping Designer.
Drop in the sources to the Mapping Designer, Drop in the target as well to Mapping Designer.Include a Join Transform to join appropriately the COUNTRY and REGION table.
Name the mapping as COUNTRY_REGION_MAPPING. While saving the mapping make sure parsing completed with no errors. Errors will be reported on the Output window of the Designer.
Once you have saved the Mapping you can now open up your Workflow Manager to create a session and a workflow.
Tasks - Create - creates a new Session or Task select the COUNTRY_REGION mapping and save the Repository.
Click on Connections/Relational to create 2 new connections for your Source and Target databases.
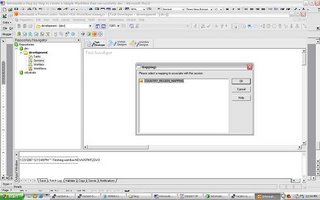
once the connections are created Click on the Task and you should see the following properties window open up click on the Mappings Tab and verify the connections are set appropriately.
When you are ready to create the Workflow – Open Workflow Designer and drag and drop the mapping.
Name the Workflow as COUNTRY_REGION_WORKFLOW
Save Repository and in the Output window verify that the workflow is valid.

Before you start running the workflow make sure to register the Power Center Server

Open Workflow Manager – Server – Server Registrationgive all the Power Center Server Registration Properties and define your PMRootDir

Click OK and , Right Click Server and assign the workflow you want to run using the Server. Once you have assigned the workflow to the server you can start the workflow – right click the workflow and click start

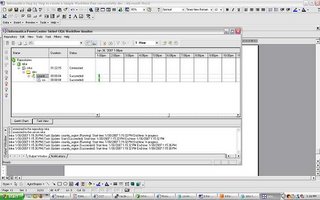
workflow monitor should start indicating the status of the run Right click the workflow and task and you should be able to view the workflow log and session log. From workflow Manager workflows can also be scheduled.
If you run into any issues running a workflow – feel free to post comments